Viega Mono Slim concealed cistern 1F
Product information
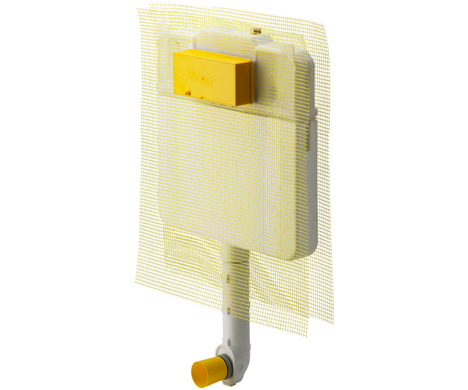
Viega Mono Slim concealed cistern 1F
for floor-standing WC, Visign flush plates, wet installation
Trade mark rights exist for this document; for further information, go to viega.com/legal .
Target groups
The information in this instruction manual is directed at the following groups of people:
Heating and sanitary professionals and trained personnel
SHK-Fachkräfte
Individuals without the abovementioned training or qualification are not permitted to mount, install and, if required, maintain this product. This restriction does not extend to possible operating instructions.
The installation of Viega products must take place in accordance with the general rules of engineering and the Viega instructions for use.
Labelling of notes
Warning and advisory texts are set aside from the remainder of the text and are labelled with the relevant pictographs.

DANGER!
This symbol warns of possible life-threatening injury.

WARNING!
This symbol warns of possible serious injury.

CAUTION!
This symbol warns of possible injury.

NOTICE!
This symbol warns of possible damage to property.

INFO!
This symbol gives additional information and hints.
About this translated version
This instruction for use contains important information about the choice of product or system, assembly and commissioning as well as intended use and, if required, maintenance measures. The information about the products, their properties and application technology are based on the current standards in Europe (e. g. EN) and/or in Germany (e. g. DIN/DVGW).
Some passages in the text may refer to technical codes in Europe/Germany. These should serve as recommendations in the absence of corresponding national regulations. The relevant national laws, standards, regulations, directives and other technical provisions take priority over the German/European directives specified in this manual: The information herein is not binding for other countries and regions; as said above, they should be understood as a recommendation.
Standards and regulations
The following standards and regulations apply to Germany / Europe and are provided as a support feature.
Regulations from section: Fields of application
Scope / Notice | Regulations applicable in Germany |
|---|---|
Specifications for installations inside buildings conveying water for human consumption | EN 806‑2 |
Application limits for filling valves for cisterns with integrated overflow | EN 14124 |
Handling
Assembly information
Installation dimensions

Required tools and materials
Required tools
The following tools are required for mounting:
Drill with 8 mm drill bit
Fork or ring spanner, size 10
screwdriver
handsaw
Blade
Required material
The following tools, which are not comprised in the scope of delivery, are required for mounting:
Material for bricking in the block
Flush plate for the WC
Assembly
Mounting the Viega Mono

-
Align the cistern and mount in the wall niche using the fixing material supplied.

-
Fix the cistern in the wall niche using mortar.

-
Brick in the cistern completely.
-
Fill the hollow spaces with mortar.
-
Plaster in the cistern completely.
NOTICE!Make sure that the reinforcement fabric is in contact with the brickwork.

-
Minimum installation height: 17 mm (wall plaster, including wall tile)
Connecting concealed cistern
NOTICE!
Do not push in the cistern during mounting.
Without existing water pipe

-
Connect the cistern from the top with a ½ inch external thread.
With existing water pipe

-
Unscrew the corner valve by hand and pull off downwards.

-
Screw the transition coupling onto the existing water pipe (½ inch external thread).

-
Reattach the corner valve and hand-tighten.
Mounting the drain elbow

-
Pull the drain elbow off the cistern.

-
Shorten the drain elbow as required (can be shorted by max. 150 mm) and deburr.

-
Reattach the drain elbow.
NOTICE!Make sure the two seals are correctly seated on the flushing pipe support.
Setting the flush volume

-
Remove the shaft cover.

-
Cut the corners of the revision shaft in up to the wall surface.
-
Fold the sides.
NOTICE!Make sure that the edge of the revision shaft is flush with the wall surface.

-
Remove the cover.

-
Loosen the locking device of the mechanism.

-
Loosen the bow of the mechanism from the drain valve.
-
Remove the mechanism towards the front.

-
Push the restrainer brackets together and withdraw the restrainer upwards.

-
Remove the restrainer towards the front.

-
Pull out the drain valve upwards.

-
Remove the drain valve on the side out of the revision opening towards the front.
INFO!You can bend the drain valve seat slightly (approx. 20°) during removal.

-
Set the small flush volume (1) and the large flush volume (2).
Mount Bowden cable unit

-
Remove the cover.

-
Loosen the locking device of the mechanism.

-
Loosen the bow of the mechanism from the drain valve.
-
Remove the mechanism towards the front.
-
Dispose of the mechanism.

-
Push the restrainer brackets together and withdraw the restrainer upwards.

-
Remove the restrainer towards the front.

-
Remove the lock on the bottom of the Bowden cable unit.

-
Push the Bowden cable unit together.

-
Reattach the lock on the bottom of the Bowden cable unit.

-
Push the Bowden cable unit onto the drain valve from the left.
-
The Bowden cable unit audibly engages.

-
Re-insert the restrainer into the cistern.
-
Attach the bracket to the rear wall of the cistern.

-
Insert the two threaded bolts into the locating bore inside the revision shaft.
-
Fasten the threaded bolts with a 90° turn.
NOTICE!Refer to the instructions for use for the flush plates for the depths of the threaded bolts.

-
Mount the Bowden cables onto the rear side of the basic panel.
-
Attach the green Bowden cable to the location marked with a green dot.
NOTICE!Pay attention to the colour coding.

-
Place the basic panel in front of the revision shaft and secure using the screws supplied.
-
Mount the flush plate on the base frame.
Cleaning and maintenance
The mechanism of the product is maintenance-free.
However, limescale deposits can affect the functionality of the components. Depending on the extent of the deposits, the inlet and drain valves of a concealed cistern must be cleaned or replaced.
Depending on the position of the flush plate, work on the concealed cistern can be carried out from the front or from above through the revision opening.
Removing the supply valve
-
Remove the cover.
-
Loosen the locking device of the mechanism.
-
Loosen the bow of the mechanism from the drain valve.
-
Remove the mechanism towards the front.
-
Push the restrainer brackets together and withdraw the restrainer upwards.
-
Remove the restrainer towards the front.

-
When the corner valve is opened, close the corner valve.
-
Separate the flexible hose from the corner valve at the union nut (size 19).

-
Separate the supply valve holder from the mounting bracket.

-
Remove the supply valve from the revision opening in a horizontal position.
Disposal
Separate the product and packaging materials (e. g. paper, metal, plastic or non-ferrous metals) and dispose of in accordance with valid national legal requirements.