WC installation frame for Prevista with LED lighting
Product information
WC installation frame for Prevista with LED lighting
for all Prevista concealed cisterns
| Year built (from): | 1.9.2018 |
Trade mark rights exist for this document; for further information, go to viega.com/legal .
Target groups
The information in this instruction manual is directed at the following groups of people:
Heating and plumbing experts and trained personnel
Drywall builders
Individuals without the above-mentioned training or qualifications are not permitted to mount, install or, if appropriate, maintain this product. This restriction does not extend to possible operating instructions.
The installation of Viega products must take place in accordance with the generally accepted rules of engineering and the Viega instructions for use.
Labelling of notes
Warning and advisory texts are set aside from the remainder of the text and are labelled with the relevant pictographs.

DANGER!
This symbol warns of possible life-threatening injury.

WARNING!
This symbol warns of possible serious injury.

CAUTION!
This symbol warns of possible injury.

NOTICE!
This symbol warns of possible damage to property.

INFO!
This symbol gives additional information and hints.
About this translated version
This instruction for use contains important information about the choice of product or system, assembly and commissioning as well as intended use and, if required, maintenance measures. The information about the products, their properties and application technology are based on the current standards in Europe (e.g. EN) and/or in Germany (e.g. DIN/DVGW).
Some passages in the text may refer to technical codes in Europe/Germany. These should serve as recommendations in the absence of corresponding national regulations. The relevant national laws, standards, regulations, directives and other technical provisions take priority over the German/European directives specified in this manual: The information herein is not binding for other countries and regions; as said above, they should be understood as a recommendation.
General notes
If you notice any damage on the product or individual components, do not carry out a repair. Instead, have the product replaced by qualified personnel.
This product is not intended for use by persons (including children) with restricted physical, sensory or mental aptitude or lack of experience and/or knowledge.
Make sure that children do not play with this product.
Symbols
Observe the symbol listed on the label:
Symbol | Description |
|---|---|
 | CE marking, Product Safety in Europe |
 | EAC marking, registration of products in the territory of the Customs Union |
 | Direct current |
 | Protection class III |
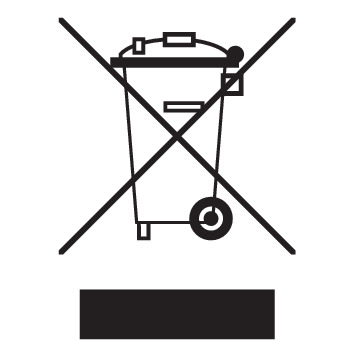 | The marked product must not be disposed of as household waste. |
Product description
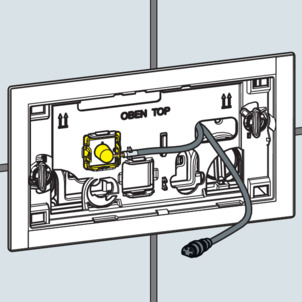
Overview

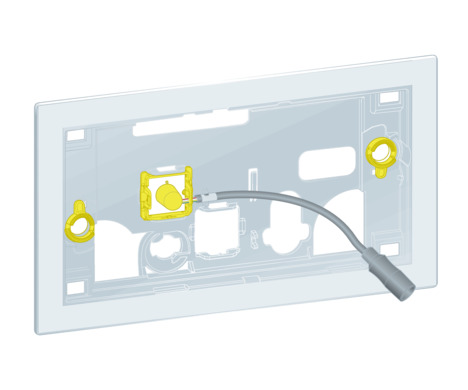
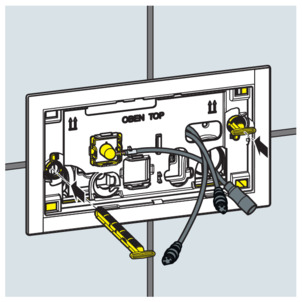
- 1 WC installation frame
- 2 Y-cable
- 3 Silicon grease (2 x 2 g)
- 4 Retaining bolt
- 5 Glue point
- 6 Infrared sensor
Technical data
Voltage [V] | Current [mA] |
|---|---|
6.5 | 100 |
Connection diagram
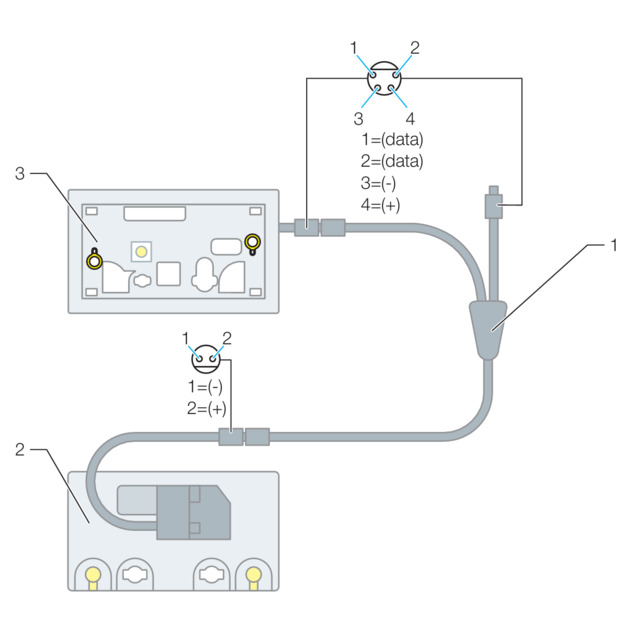
- 1 Adapter
- 2 Electronic drive unit
- 3 WC installation frame for Prevista
Handling
Assembly
Mounting the installation frame
Requirements:
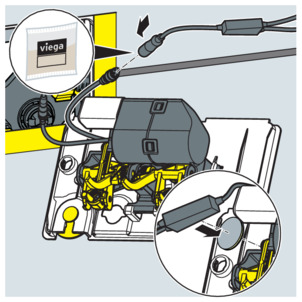
The power pack is installed and connected to the motor.
The control has been plugged onto the cover plate.
The cistern is fitted into the pre-wall.
The pre-wall is tiled.
-
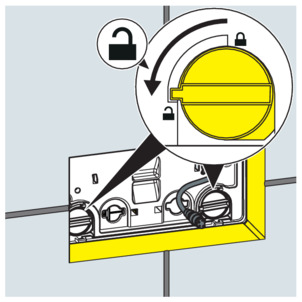
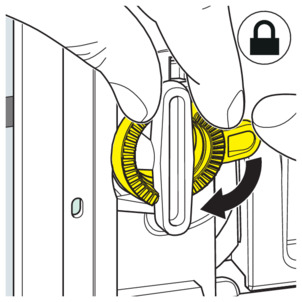
Turn the cover plate lock 90° in anti-clockwise direction.
-
Remove the cover plate.
-
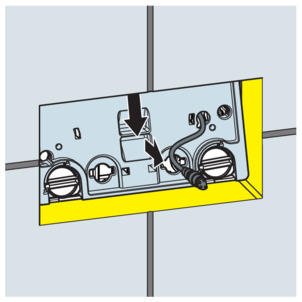
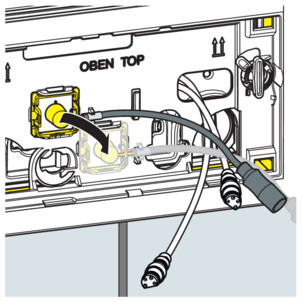
Apply the silicon grease to the electronic connections.
-
Connect the Y-cable with the single-assignment side to the control.
-
Fasten the Y-cable on the rear of the cover plate using the adhesive point.
-
Guide the two ends of the Y-cable forward through the right-hand opening of the cover plate.
-
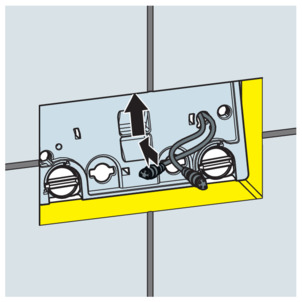
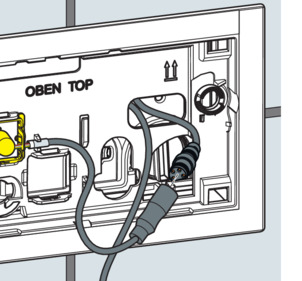
Replace the cover plate and lock it.
-
Put on the installation frame.
-
Insert the retaining bolts.

-
Turn the retaining bolts by 90° in a clockwise direction.
-
Align the installation frame.
-
To fix the retaining bolts, turn safety rings in a clockwise direction.
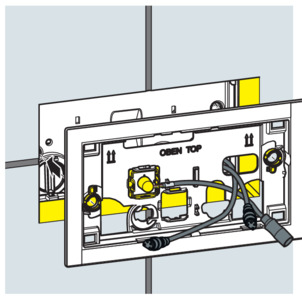
When using the WC flush plate Visign for More 201:
-
Loosen the infrared sensor and plug it on the bottom wall bracket.
-
Apply the silicon grease to the connections.
-
Connect the short end of the Y-cable to the installation frame.
-
Push the major part of the cable back into the cistern.
-
The installation frame has been mounted and the flush plate can be mounted.
Errors, faults and remedy
INFO!
In case of malfunctions, disconnect the model from the power supply and reconnect it after one minute.
Disposal
Separate the product and packaging materials (e. g. paper, metal, plastic or non-ferrous metals) and dispose of in accordance with valid national legal requirements.