Urinal installation frame for Prevista tile-level
Product information
Urinal installation frame for Prevista tile-level
for tile-level installation of the urinal flush plate
| Year built (from): | 1.3.2019 |
Trade mark rights exist for this document; for further information, go to viega.com/legal .
Target groups
The information in this instruction manual is directed at the following groups of people:
Heating and sanitary professionals and trained personnel
Drywall builder
Individuals without the abovementioned training or qualification are not permitted to mount, install and, if required, maintain this product. This restriction does not extend to possible operating instructions.
The installation of Viega products must take place in accordance with the general rules of engineering and the Viega instructions for use.
Labelling of notes
Warning and advisory texts are set aside from the remainder of the text and are labelled with the relevant pictographs.

DANGER!
This symbol warns of possible life-threatening injury.

WARNING!
This symbol warns of possible serious injury.

CAUTION!
This symbol warns of possible injury.

NOTICE!
This symbol warns of possible damage to property.

INFO!
This symbol gives additional information and hints.
About this translated version
This instruction for use contains important information about the choice of product or system, assembly and commissioning as well as intended use and, if required, maintenance measures. The information about the products, their properties and application technology are based on the current standards in Europe (e.g. EN) and/or in Germany (e.g. DIN/DVGW).
Some passages in the text may refer to technical codes in Europe/Germany. These should serve as recommendations in the absence of corresponding national regulations. The relevant national laws, standards, regulations, directives and other technical provisions take priority over the German/European directives specified in this manual: The information herein is not binding for other countries and regions; as said above, they should be understood as a recommendation.
Product description
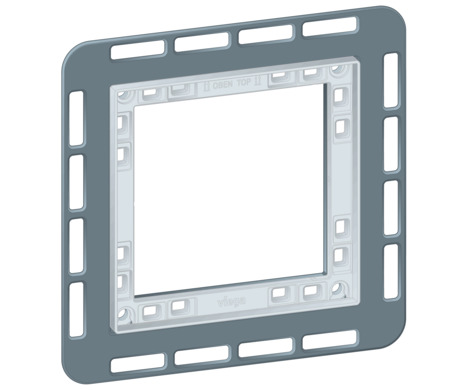
Overview

- 1 installation frame
- 2 Cover plate
- 3 Bolt
- 4 clips
- 5 suction cups
- 6 base frame
Handling
Assembly
Mounting the installation frame
Requirements:
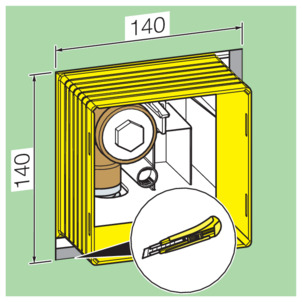
The urinal is fitted into the pre-wall.
The pre-wall is covered with cladding.

-
Cut into the sticky tape of the shaft cover.

-
Remove the shaft cover.
-
Widen the cutout around the shaft cover.
-
Remove the protective foil from the glue points.
-
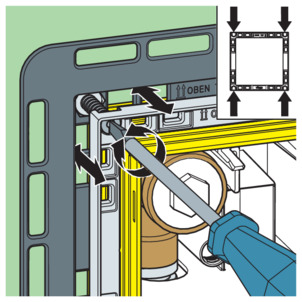
Insert the base frame in the shaft and align it.
-
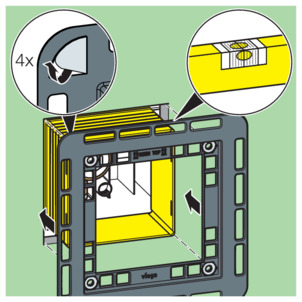
Insert the bolts in the installation frame.

-
Measure the distance from the cladding to the tile level.
-
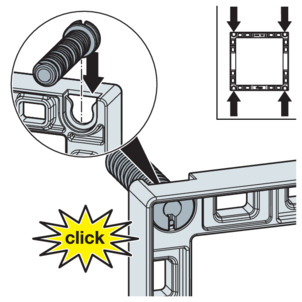
Set the installation frame to the measured depth.
-
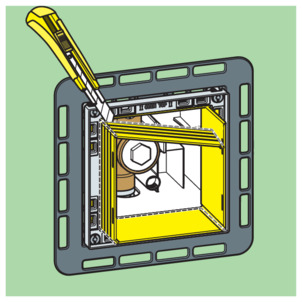
Cut into the four corners of the shaft cover.
-
Cut the four segments off flush with the installation frame.
-
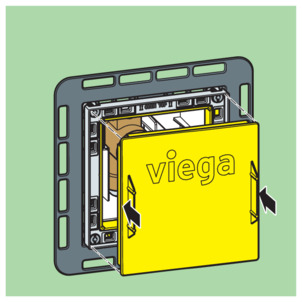
Attach the cover plate.

-
The installation frame has been mounted and the flush plate can be mounted.
Preparing the installation frame for urinal flush plate
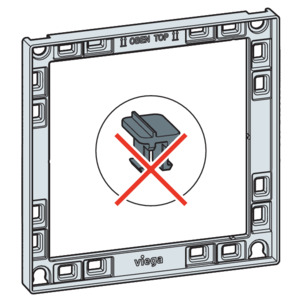
The arrangement of the clips differ according to the flush plate.
-
Do not insert clips into the installation frame for the urinal flush plate Visign for More 200 plastic.
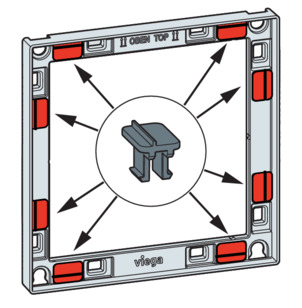
-
Insert the clips into the installation frame for the urinal flush plate Visign for More 200 glass / wood.
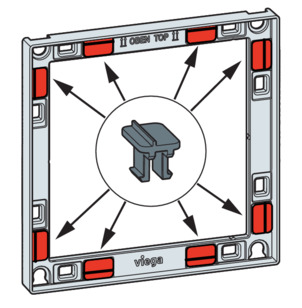
-
Insert the clips into the installation frame for the urinal flush plate Visign for Style 20 or 21.
Disposal
Separate the product and packaging materials (e. g. paper, metal, plastic or non-ferrous metals) and dispose of in accordance with valid national legal requirements.