Advantix Vario tile end rail
Product information
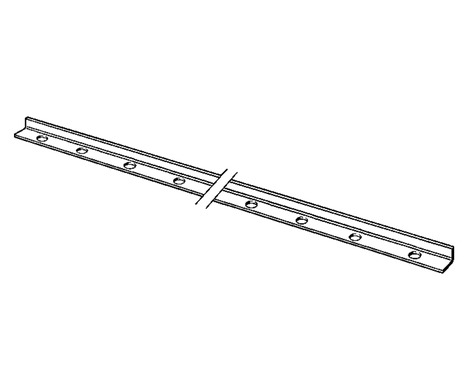
Advantix Vario tile end rail
For mounting with an Advantix Vario shower channel
| Year built (from): | 01-01-17 |
Trade mark rights exist for this document; for further information, go to viega.com/legal .
Target groups
The information in this instruction manual is directed at the following groups of people:
Heating and sanitary professionals and trained personnel
SHK-FachkräfteTilers
Fliesenleger
It is not permitted for individuals without the abovementioned training or qualification to mount, install and, if required, maintain this product. This restriction does not extend to possible operating instructions.
The installation of Viega products must take place in accordance with the general rules of engineering and the Viega instructions for use.
Labelling of notes
Warning and advisory texts are set aside from the remainder of the text and are labelled with the relevant pictographs.

DANGER!
This symbol warns against possible life-threatening injury.

WARNING!
This symbol warns against possible serious injury.

CAUTION!
This symbol warns against possible injury.

NOTICE!
This symbol warns against possible damage to property.

INFO!
Notes give you additional helpful tips.
About this translated version
This instruction for use contains important information about the choice of product or system, assembly and commissioning as well as intended use and, if required, maintenance measures. The information about the products, their properties and application technology are based on the current standards in Europe (e. g. EN) and/or in Germany (e. g. DIN/DVGW).
Some passages in the text may refer to technical codes in Europe/Germany. These should serve as recommendations in the absence of corresponding national regulations. The relevant national laws, standards, regulations, directives and other technical provisions take priority over the German/European directives specified in this manual: The information herein is not binding for other countries and regions; as said above, they should be understood as a recommendation.
Product description
The tile end rail is intended for mounting a Viega Advantix Vario shower channel or a Viega Advantix Vario wall drain.
Overview of the components
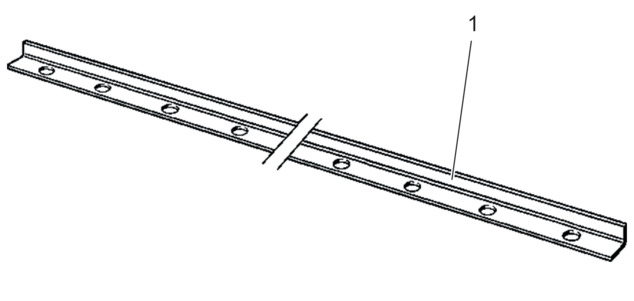
- 1 Stainless steel tile end rail 1.4301
Handling
Assembly information
Important note
During assembly:
Observe installation dimensions.
After assembly:
The shower channel must be fully lined with mortar.
Coordinate all relevant installation details, especially regarding the bonded sealing, with those responsible for the subsequent work.
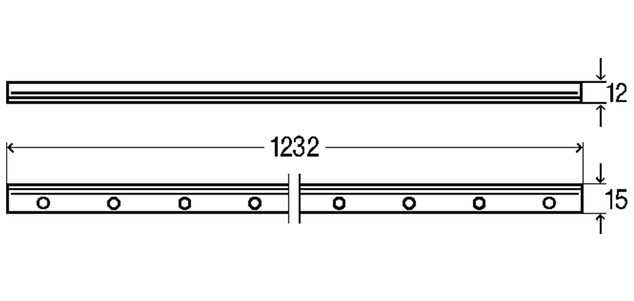
Installation dimensions
Assembly
Requirements:
The shower channel has been mounted according to the instructions for use.
The complete surface of the shower channel has been lined.
The shower channel has been sealed, and the thin bed sealing is fully cured.
The shower channel is equipped with a protective insert.
-
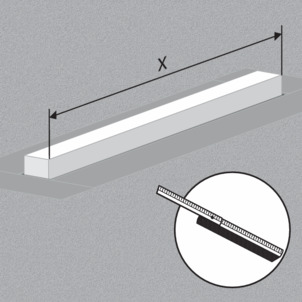
Measure the length X between the ends of the hard foam block.
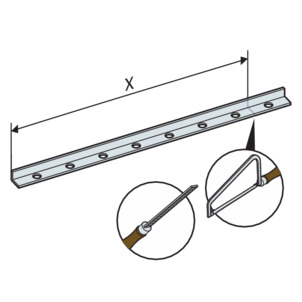
-
Cut the tile end rail to the length X.
-
Deburr edges that were cut.
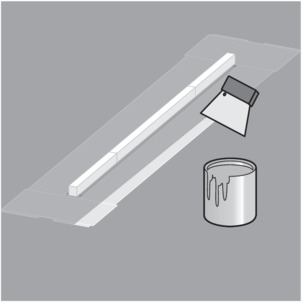
-
Apply the tile adhesive.
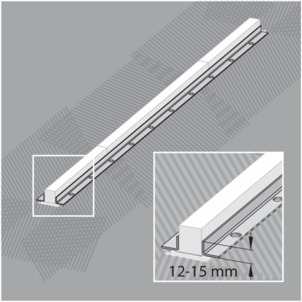
-
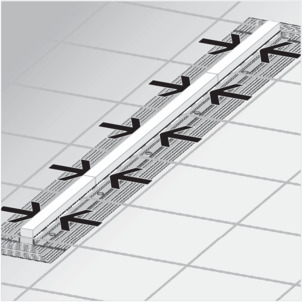
Glue the tile end rail in a straight line at the protective insert.
The tile end rail must extend up to the protective insert at both ends.
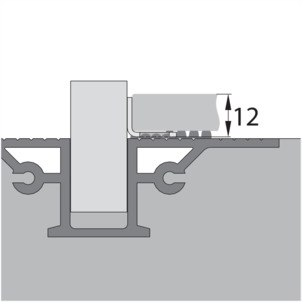
-
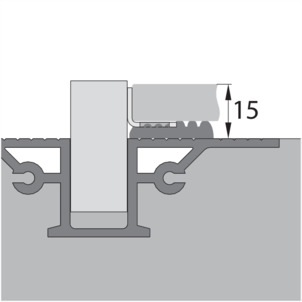
Mounting height 12 mm: Press the tile end rail down into the tile adhesive as far as it will go.
-
Mounting height 15 mm: Set the tile end rail onto a tile adhesive bed of a thickness of max. 3 mm.
-
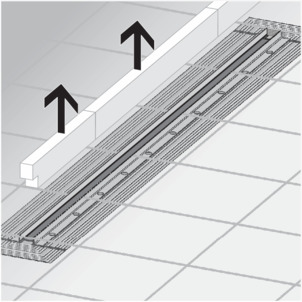
Lay the tiles so that they touch the tile end rail.
-
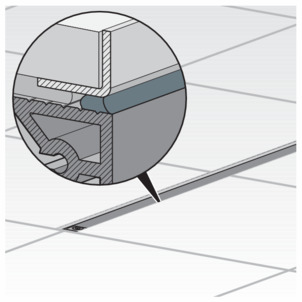
Remove protective insert.
-
If a gap has formed at the inside of the shower channel, seal it with tile adhesive or joint filler.
Disposal
Separate the product and packaging materials (e. g. paper, metal, plastic or non-ferrous metals) and dispose of in accordance with valid national legal requirements.